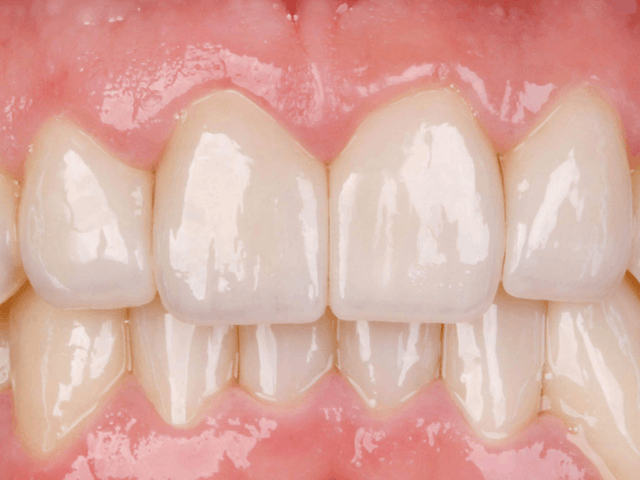
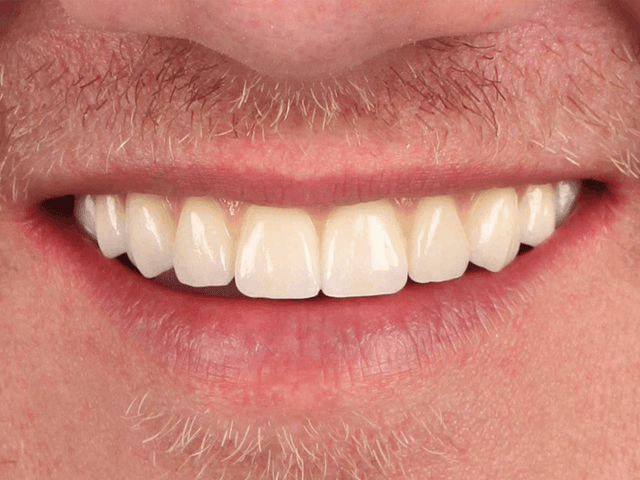
0.31 mm. That is the average thickness of facial enamel 1 mm above the cementoenamel junction on an upper central incisor, measured on 40 extracted teeth from patients aged 30 to 69 in a 2005 study. A common veneer depth cutter is 0.5 mm. Every decision in a veneer prep, from the first groove to the margin, has to fit inside a layer that thin.
Quick Answer
Plan the veneer prep from the final shape, not from the tooth as it is. Approve a mock-up from a diagnostic wax-up, cut depth grooves through it with a guide, and reduce only what the ceramic needs: for IPS e.max Press, Ivoclar sets 0.3 mm (0.4 mm incisal) for thin veneers and 0.6 mm (0.7 mm incisal) for veneers. Keep the prep and the margins in enamel, round every edge, and send the lab a clear scan and the approved mock-up.
Below are the seven steps in the order you do them, with what each one means for the veneers we make on the bench.
Step 1: Plan From the Final Shape, Not the Tooth
A veneer is a thin shell bonded to the tooth, so its thickness is measured from the tooth surface to the final contour. If the final tooth will be longer, fuller or moved facially, part of that thickness is already "outside" the tooth and needs no cutting. Prep the existing tooth to a fixed depth instead, and you remove enamel the case never needed.
That is why the work starts with a diagnostic wax-up: the planned teeth, built on the model or designed on the scan. From the wax-up comes a mock-up, a tooth-colored resin copy you place over the unprepared teeth, and from the same wax-up comes the reduction guide. The patient sees the shape before anything is cut.
The approach has a long clinical record. In a 12-year series of 580 porcelain laminate veneers in 66 patients, prepared through an additive mock-up (the aesthetic pre-evaluative temporary, or APT, technique), more than 80% of the preparations stayed within enamel, and when they did, failures from debonding and microleakage fell to 0%.

Elegant Dental Laboratory makes the diagnostic wax-up, the mock-up and the reduction guide for veneer cases. If the patient has already approved a smile preview, send it with the case: we accept face photos and smile design files, and the wax-up follows what the patient said yes to.
Step 2: Map the Enamel Before You Pick Up the Bur
Facial enamel is thinnest at the cervical third, exactly where the veneer margin sits. In the 2005 study, the average was 0.31 mm at 1 mm above the CEJ, 0.54 mm at 3 mm and 0.75 mm at 5 mm. A 1992 study that measured 114 extracted teeth reached the same practical conclusion: about 0.5 mm of enamel reduction gives minimal porcelain thickness without an overcontoured veneer, and exposing dentin is to be avoided because resin bonds better to enamel than to dentin.
Age makes the map tighter. Facial enamel thickness fell steadily from about age 50 in the 2005 study, and a 2023 CBCT study of 324 upper incisors also found facial enamel above the CEJ thinner in older patients, and thicker in women than in men. For an older patient with recession, assume the cervical enamel is thinner than the averages below.
| Zone of an upper central incisor | Average facial enamel | Minimum for an e.max Press thin veneer | Minimum for an e.max Press veneer |
|---|---|---|---|
| 1 mm above the CEJ (cervical) | 0.31 mm | 0.3 mm | 0.6 mm |
| 3 mm above the CEJ | 0.54 mm | 0.3 mm | 0.6 mm |
| 5 mm above the CEJ | 0.75 mm | 0.3 mm | 0.6 mm |
| Incisal edge | Not measured this way | 0.4 mm | 0.7 mm |
Read the table as a depth budget. The minimums are thicknesses of the finished veneer, so where the mock-up adds bulk, less of that thickness has to come out of the tooth. Where the final contour stays on the existing surface, a standard 0.6 mm veneer at the cervical third would have to go through the enamel; that is a reason to plan a thin veneer there, or to move the contour, rather than to cut deeper.

Step 3: Cut Depth Grooves Through the Mock-Up
With the mock-up seated, cut the depth grooves through it, not through the bare tooth. The resin shell stands for the final contour, so a 0.3 mm or 0.5 mm groove measures veneer thickness, not tooth removal. Mark the groove bottoms with a pencil, remove the mock-up and reduce to the marks.
Then check the depth with a guide. How much the guide matters shows in a 2022 lab study of 50 resin incisors prepared for window veneers: freehand preps missed the planned depth by 0.19 mm in the cervical third and 0.27 mm in the incisal third on average. A silicone index cut that to 0.12 to 0.16 mm, a thermoformed guide to 0.09 to 0.11 mm, and 3D-printed guides to 0.05 to 0.07 mm. A freehand miss of 0.19 mm is more than half of the 0.31 mm of enamel at the cervical third.

Depth-cutting burs alone tend to run deep. In a 2020 study on 20 typodont incisors with a planned depth of 0.5 mm, the group prepared with depth gauge burs finished at 0.599 mm, about 0.1 mm deeper than planned, against 0.547 mm with a printed guide. A tenth of a millimeter sounds small until it is a third of the cervical enamel.

Step 4: Keep the Facial and Cervical Reduction in Enamel
Enamel is not only about bond strength in a lab test; it decides how long veneers last. In the same 580-veneer series followed for up to 12 years, 42 veneers (7.2%) failed and overall cumulative survival was 86%. Veneers with preparations confined to enamel survived at 99%, and those with enamel only at the margins at 94%.
Veneers bonded to dentin, and teeth with preparation margins in dentin, were about 10 times more likely to fail than veneers bonded to enamel in a 12-year series of 580 veneers. Fracture was the most frequent failure.
The same analysis found that coronal crown lengthening raised the risk of failure by 2.3 times. If the plan needs more room than the enamel can give, change the plan before you cut: a thin veneer instead of a standard one, a fuller final contour, orthodontic alignment first, or a different restoration. For darker teeth, remember that a thicker prep is not the only way to mask color; our article on masking a dark tooth compares the options by material.
Step 5: Choose the Incisal Design
The three usual designs are a window (the incisal edge left intact), a butt joint (the edge reduced and covered end to end) and an overlap (the veneer wraps onto the palatal surface). The evidence does not crown a winner. A 2016 meta-analysis of 8 clinical studies estimated survival at 88% with incisal coverage and 91% without, an odds ratio of 1.25, and concluded that veneers survived well with or without incisal coverage. A 2017 meta-analysis of 10 studies found a higher failure risk with incisal coverage in time-to-event data (hazard ratio 1.81), but not in the simple count of failures, and no significant difference between overlap, butt joint and window designs.
In practice the incisal design follows the case. If the veneer lengthens the tooth or changes the edge color, the edge has to be covered, and Ivoclar's minimum then applies at the edge: 0.4 mm for an e.max Press thin veneer and 0.7 mm for a veneer. If the edge is sound and keeps its length, a window or a light butt joint saves enamel. Whatever you pick, round the line angles: Ivoclar's preparation rules for e.max Press call for no angles or sharp edges.
Step 6: Finish the Margins and Contacts
For IPS e.max Press, Ivoclar asks for a shoulder with a rounded internal angle or a pronounced chamfer, and it lists very deep subgingival preparations under the limitations of use. On veneers the margin usually sits at or just above the gingiva, where the enamel layer is thinnest, so finish it lightly and keep it smooth enough for the scanner or impression to read in one continuous line.
Decide here whether to keep or open the proximal contacts. Keeping them saves enamel; opening them lets the ceramic wrap the proximal surface, which a diastema closure or a strong color change may need. Tell the lab which you chose.
Veneers are bonded, not cemented: Ivoclar makes adhesive cementation mandatory for e.max Press veneers and thin veneers. Our guide to which cement to use for e.max covers the bonding choices.
Step 7: Record the Prep and Send the Case
A veneer case lives or dies on information the lab cannot see on the model. Before the patient leaves:
- Scan or impress the preps with the margins clean and dry; for a scan, include the full arch and the bite.
- Photograph the preps with a shade tab in the frame. A dark prep changes which ceramic will work, and our IPS e.max Press options include HO ingots for dark preparations.
- Scan the approved mock-up or the provisionals, so the lab copies the length and shape the patient accepted.
- Send retracted and smile photos, and the smile preview if there is one.
- On the Rx, write the material, thin or standard veneer, the incisal design and whether contacts were opened.
When your scan arrives, our technicians mark the margin, and if the scan shows a problem, such as not enough room for the ceramic or an incomplete bite, we call within a couple of days instead of guessing. Cases are made in house in Brooklyn, with turnaround from 5 business days, and our drivers pick up and deliver across New York City, Long Island and northern New Jersey. Practices elsewhere ship with a free prepaid UPS label from Send a Case, and the veneer options are on our IPS e.max page. The full record list for anterior work is in our anterior esthetic case checklist, and the materials are compared in e.max vs. zirconia vs. feldspathic veneers.
FAQ
How deep should a veneer prep be?
Deep enough for the ceramic's minimum thickness under the final contour, no deeper. For IPS e.max Press that is 0.3 mm (0.4 mm incisal) for a thin veneer and 0.6 mm (0.7 mm incisal) for a veneer. Because the mock-up adds bulk, the tooth itself often loses less than those numbers, and the cervical third, with about 0.3 mm of enamel, should lose the least.
Can veneers be placed with no prep at all?
Sometimes, when the final contour sits outside the existing tooth everywhere by at least the material's minimum, for example on small or retroclined teeth. Where the veneer would add bulk to an already full tooth, a no-prep veneer ends up overcontoured, which is exactly what the minimal 0.5 mm reduction in the 1992 study was meant to avoid. The mock-up shows which situation you have.
What if I expose dentin during the prep?
Note it on the Rx and in the chart. In the 12-year series, veneers bonded to dentin or with margins in dentin were about 10 times more likely to fail, and survival was 94% when enamel remained only at the margins, so a small island of dentin with enamel all around the margin is a different risk from a margin in dentin. If dentin shows at the margin, reconsider the restoration before taking the final scan.
Sources (11)
- Atsu SS, Aka PS, Kucukesmen HC, Kilicarslan MA, Atakan C. Age-related changes in tooth enamel as measured by electron microscopy: implications for porcelain laminate veneers. J Prosthet Dent. 2005;94(4):336-341. doi:10.1016/j.prosdent.2005.08.008
- Ferrari M, Patroni S, Balleri P. Measurement of enamel thickness in relation to reduction for etched laminate veneers. Int J Periodontics Restorative Dent. 1992;12(5):407-413. PubMed 1343012
- Al-Zahawi AR, Ibrahim RO, Talabani RM, et al. Age and sex related change in tooth enamel thickness of maxillary incisors measured by cone beam computed tomography. BMC Oral Health. 2023;23(1):971. doi:10.1186/s12903-023-03639-y
- Gurel G, Morimoto S, Calamita MA, Coachman C, Sesma N. Clinical performance of porcelain laminate veneers: outcomes of the aesthetic pre-evaluative temporary (APT) technique. Int J Periodontics Restorative Dent. 2012;32(6):625-635. PubMed 23057051
- Gurel G, Sesma N, Calamita MA, Coachman C, Morimoto S. Influence of enamel preservation on failure rates of porcelain laminate veneers. Int J Periodontics Restorative Dent. 2013;33(1):31-39. doi:10.11607/prd.1488
- Gao J, He J, Fan L, Lu J, Xie C, Yu H. Accuracy of reduction depths of tooth preparation for porcelain laminate veneers assisted by different tooth preparation guides: an in vitro study. J Prosthodont. 2022;31(7):593-600. doi:10.1111/jopr.13456
- Li ZY, Bai HF, Zhao YJ, Wang Y, Ye HQ, Sun YC. 3D evaluation of accuracy of tooth preparation for laminate veneers assisted by rigid constraint guides printed by selective laser melting. Chin J Dent Res. 2020;23(3):183-189. doi:10.3290/j.cjdr.a45222
- Luo T, Li J, Xie C, Yu H. Accuracy of three digital waxing-guided trial restoration protocols for controlling the depths of tooth preparation for ceramic veneers. J Prosthet Dent. 2024;131(1):56-63. doi:10.1016/j.prosdent.2021.12.029
- Albanesi RB, Pigozzo MN, Sesma N, Laganá DC, Morimoto S. Incisal coverage or not in ceramic laminate veneers: a systematic review and meta-analysis. J Dent. 2016;52:1-7. doi:10.1016/j.jdent.2016.06.004
- Hong N, Yang H, Li J, Wu S, Li Y. Effect of preparation designs on the prognosis of porcelain laminate veneers: a systematic review and meta-analysis. Oper Dent. 2017;42(6):E197-E213. doi:10.2341/16-390-L
- Ivoclar. IPS e.max Press Instructions for Use, Rev. 2, 2026-01-08. PDF
Minimum thicknesses and cementation rules change with each revision of the manufacturer's instructions; follow the current instructions for the material you prescribe.