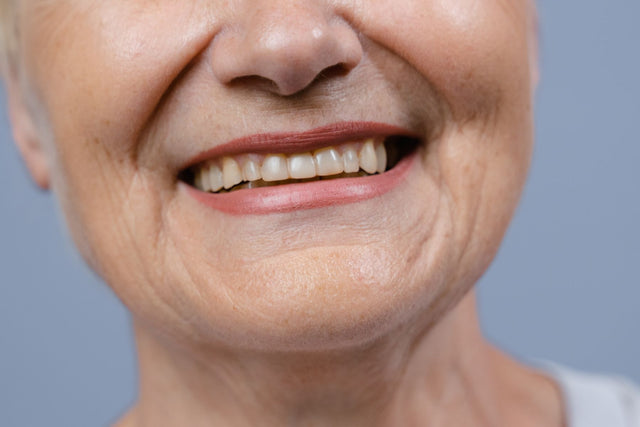
For an esthetic case, the lab needs a standardized set of photos: the face, the lips at rest and the full smile, a retracted frontal view, a close-up of the anterior teeth against a black contrastor with the shade tab in the same plane, and a cross-polarized version of that close-up, because the scan shows the technician every margin and contact but not how translucent the incisal edge is, where the white spots sit or how dark the prepared tooth is.

A macro lens with flash remains the reference; a recent smartphone with dental lighting, optical zoom and a gray card can work well. Consistent technique matters more than the device.
The photos that reach a lab are often taken at an angle, with the flash bouncing off wet enamel and the shade tab out of focus. The steps below follow the order you work in, from choosing the equipment to sending the files.
Step 1: Choose Your Equipment
Phone or camera
Settle this first, because it decides the rest of your kit. A 2026 systematic review of 8 studies found no consistent winner for shade assessment and called the heterogeneity between studies substantial: the protocol for light, calibration and capture mattered more than the device. The individual studies show where each one wins.
| What was tested | Smartphone | DSLR with macro lens and flash |
|---|---|---|
| Shade assessment (review of 8 studies) | Neither consistently better; protocol matters most | |
| Color error with a gray-card calibration (25 volunteers, 9 views) | Lower than the DSLR after calibration | Standardized white balance only |
| Arch width measured on photos (same study) | No difference at 4x optical zoom on one phone; another phone underestimated | Reference |
| Image quality and distortion (4 phones, 3 DSLRs, orthodontic views) | Lower quality, more distortion | Better quality and dimensional accuracy |
| Color representation (same study) | No significant difference | |
| Expert preference (40 participants, 600 images) | Acceptable with added lighting | Preferred in 96.7% for diagnosis and presentation |
Read it this way: a phone without added light, held close with its wide lens, is the weakest option. A phone used at a distance with optical zoom, a dental light and a gray card can be good enough for shade communication. A macro lens with a twin or ring flash is still the safest choice for demanding anterior cases, and the 2026 calibration study itself concluded that DSLR cameras kept advantages there.
Lens
If you choose a camera, the long-standing recommendation is a 100 to 135 mm macro lens that reaches a magnification of 1:1. A 2026 in vitro study shows why it matters for color: under cross-polarized light, three macro lenses had a mean color error of 1.2 with no meaningful difference between brands, while four zoom lenses had means of 2.95 to 3.35, above the 2.7 acceptability threshold.
Mean color error of three macro lenses under cross-polarized light in a 2026 in vitro study. Four zoom lenses had means of 2.95 to 3.35, above the 2.7 acceptability threshold.
Flash
Use a ring flash when you need even light into the back of the mouth; it suits occlusal and lateral views. Use a twin flash, one head on each side of the lens, for anterior teeth: it gives more shape and texture, which is what a ceramist wants to see.
Accessories
- Cheek retractors, a pair for frontal views and a single one for laterals.
- Occlusal and buccal mirrors, kept warm so they do not fog.
- A black contrastor to block out the dark oral background behind the incisors.
- A gray reference card for white balance.
- A cross-polarizing filter set for the flash and the lens, if you take shade photos often.
Step 2: Set Up the Light and Background
Before the shade shots, change what sits behind the teeth and what bounces off them.
Black contrastor
Place a black contrastor behind the upper incisors. It removes the tongue, gums and dark oral cavity from the background, so the incisal third, its halo and its translucent zones show clearly, and those are the details a ceramist has to layer. It is a standard view in the photographic studies: one 2026 comparison used "maxillary anterior with black contrastor" as one of its five standard views.

Cross-polarized light
Saliva and surface texture throw back flash as white glare that hides the color beneath. Put a polarizing filter on the flash and a crossed filter on the lens: together they cancel that specular reflection, and a 2012 study showed repeatable glare-free tooth images with it. Take the polarized photo in addition to the normal one, not instead. The polarized image shows internal color and chroma, while the normal image shows surface texture and luster.
Step 3: Take the Shade Photos
This is the step that changes the crown. In the clearest clinical test, a 2022 study, 45 patients needed ceramic crowns, and shade was recorded three ways: visually with a shade guide, with a camera (85 mm lens, close-up flash, with and without a cross-polarizing filter) and with a smartphone attached to an LED light-correcting device. A gray reference card sat by the lower teeth in every photo for white balance. All crowns were IPS e.max CAD, cemented with the same resin cement, and the color difference to the adjacent tooth was then measured.

Crowns made from a shade tab chosen by eye differed from the adjacent tooth by a Delta E of 5.32. Crowns made with camera photos (2.75) or smartphone photos with the light-correcting device (2.34) stayed under the 3.7 acceptability threshold. Two more studies compared photos with a spectrophotometer. In 60 volunteers, the color difference to a spectrophotometer reading was 7.35 for visual shade taking and 6.12 for cross-polarized photography. In 56 subjects, cross-polarized photos agreed substantially with a spectrophotometer on the VITA classical guide (kappa 0.736).
When you take your own, hold the tab in the plane of the tooth: edge to edge with the incisal edge, at the same distance from the lens, so the flash lights both equally. Keep the gray card beside the teeth, as the study did. Light, timing and the stump shade are covered in our guide to shade matching and stump shades.
Step 4: Take the Esthetic Case Set
For veneers and anterior crowns, the technician also needs to see the teeth in the face. A widely cited 1985 standardization paper listed 5 intraoral views (frontal, two lateral and two occlusal) and six facial views, and a Chinese esthetic dentistry consensus of 2017 proposed 16 standard images. For anterior restorations, this set covers what the lab uses:
| View | How to take it | What the lab uses it for |
|---|---|---|
| Full face, smiling | Camera at eye level, head straight, interpupillary line level | Midline, incisal plane against the face, tooth size |
| Lips at rest | Lips relaxed and slightly parted | How much incisal edge shows at rest |
| Full smile | Natural smile, front and both sides at 45 degrees | Smile line, buccal corridors, gingival display |
| Retracted frontal | Teeth slightly apart, occlusal plane level | Overall shade, gingival levels, axial inclinations |
| Anterior close-up with contrastor | Black contrastor behind the incisors, shade tab in the same plane as the tooth | Incisal translucency, halo, characterizations |
| Cross-polarized close-up | Same framing, polarizing filters on | Internal color and chroma without glare |
| Occlusal mirror view | Mirror at 45 degrees, photograph the reflection | Arch form, incisal edge thickness |
| Prepared teeth with stump tab | After preparation, before the impression or scan | Substrate color for material and opacity choice |
Do not skip the last row when a discolored tooth sits next to sound ones, the classic problem. In a 2026 case report, the authors matched a crown and four veneers on maxillary incisors by giving the crowned tooth a high-opacity lithium disilicate core shaped and shaded like the adjacent prepared teeth, then bonding high-translucency veneers to all of them with the same cement. The approach depends on the lab knowing exactly how dark each substrate is, and that comes from photos of the preparations with stump shade tabs. Our guide to veneer materials covers which ceramic fits which substrate, and our anterior esthetic case checklist lists the rest of the records for an esthetic case.
Step 5: Keep Every Photo Consistent
Take every set the same way, so the lab can compare one visit with the next.
- Fix the settings. Use manual exposure, a fixed flash power and the same magnification for every case.
- Put a gray card in the frame. It gives the technician a known reference for white balance. The eLABor_aid protocol builds on the same idea: cross-polarized photos with a gray reference card, a camera profile and analysis in the CIELAB color space, so a clinician and a technician in different places can work from numbers.
- Turn off phone processing. Portrait mode, beauty filters and automatic HDR change color and texture. Use the phone's standard or pro camera with optical zoom.
Step 6: Send Them With the Case
Write on the Rx which shade guide you used; our guide to filling out a lab Rx covers the rest of the form.
When the case comes to Elegant Dental Laboratory, shade photos come to us by email, and we accept spectrophotometer data. A stump shade is required for anterior all-ceramic crowns. For smile cases, we accept face photos and smile design files, including a patient-approved smile preview sent with the case. If the photos still leave doubt, a shade visit at the lab settles it: custom shade matching with the patient at the lab is available.

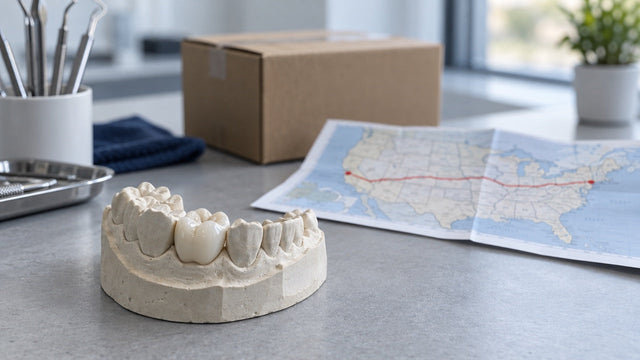
We are a full-service lab at 2308 McDonald Ave in Brooklyn, New York, founded in 2007 by Gary Fingerman, with more than 35 technicians in a 7,000 sq. ft. facility, and every case is made in house. For esthetic cases we make diagnostic wax-ups, mock-ups and reduction guides, IPS e.max veneers from 0.3 mm and crowns, including HO ingots for dark preparations, and zirconia with porcelain for anterior teeth. Turnaround is from 5 business days. Our drivers pick up and deliver free in all five New York City boroughs, Long Island and 13 northern New Jersey counties, and practices anywhere can print a prepaid UPS label. To start, send a case or call 877-335-5221.
Checklist: Photos to Send
For a single anterior crown, send the first four. For veneers or smile makeovers, add the last three.
- Retracted frontal view, teeth slightly apart.
- Anterior close-up against the black contrastor, shade tab in the same plane as the tooth, gray card in the frame.
- Cross-polarized close-up with the same framing.
- Prepared tooth with the stump shade tab, before the impression or scan.
- Full face, smiling.
- Lips at rest.
- Full smile, front and both sides.
In Short
- Photos change the result: in 45 patients, e.max crowns made from a shade chosen by eye differed from the adjacent tooth by a Delta E of 5.32, while crowns made with camera photos or smartphone photos with a light-correcting device stayed under the 3.7 acceptability threshold.
- Protocol beats device: a review of 8 studies found neither smartphones nor DSLR cameras consistently better, and with a gray-card calibration, smartphone photos had lower color error than DSLR photos with standardized white balance in a 2026 study of 25 volunteers.
- If you use a camera, use a macro lens: under cross-polarized light, macro lenses gave a mean color error of 1.2 against 2.95 to 3.35 for zoom lenses.
- For an anterior crown, send a retracted frontal view, a contrastor close-up with the shade tab, a cross-polarized close-up and the preparation with the stump shade tab.
FAQ
Do I need photos for a posterior crown?
Often not. For posterior single units, the scan and a shade usually suffice; photos are worth adding for any tooth with visible characterization.
Can my scanner's shade reading replace the photos?
No. If your scanner records shade, send that reading too, but alongside the photos rather than instead of them. A 2025 study of 56 subjects found that cross-polarized photography was more reliable than the intraoral scanner and produced fewer cases over the acceptability threshold.
Should I edit the photos before sending?
No. Send the original files with the gray card in the frame and let the lab balance them.
Sources (16)
- Jorquera GJ, et al. A comparison of ceramic crown color difference between different shade selection methods: Visual, digital camera, and smartphone. J Prosthet Dent. 2022;128(4):784-792. doi:10.1016/j.prosdent.2020.07.029
- Mahn E, et al. Comparison of visual analog shade matching, a digital visual method with a cross-polarized light filter, and a spectrophotometer for dental color matching. J Prosthet Dent. 2021;125(3):511-516. doi:10.1016/j.prosdent.2020.02.002
- Gonzalez-Chavez JA, et al. Reliability of Dental Shade Selection Methods: Agreement Among Spectrophotometer, Intraoral Scanner, and Cross-Polarization Photography. J Esthet Restor Dent. 2025;37(7):1784-1790. doi:10.1111/jerd.13458
- Alhumoud T, et al. Performance of smartphone cameras for measuring and analyzing dental shade: A systematic review. J Dent. 2026;166:106506. doi:10.1016/j.jdent.2026.106506
- Yuan J, et al. Comparison of accuracy and reliability between smartphone and digital single-lens reflex camera in clinical dental photography: an in vivo study. Clin Oral Investig. 2026;30(8):331. doi:10.1007/s00784-026-07025-0
- Nandhra K, et al. Smartphones or digital SLRs for clinical dental photography: is there a difference? Eur J Orthod. 2025;47(4):cjaf033. doi:10.1093/ejo/cjaf033
- Luu VT, et al. Evaluation of color accuracy and image quality of smartphone cameras compared to digital single-lens reflex cameras for dental photography. Health Informatics J. 2025;31(4):14604582251410795. doi:10.1177/14604582251410795
- Moussa C, et al. Accuracy of Dental Photography: Professional vs. Smartphone's Camera. Biomed Res Int. 2021;2021:3910291. doi:10.1155/2021/3910291
- Bengel W. Standardization in dental photography. Int Dent J. 1985;35(3):210-217. PubMed 3863799
- Jasim AA, et al. Comparative Analysis of Macro and Zoom Lenses for Dental Shade Selection: An In Vitro Study. Clin Exp Dent Res. 2026;12(5):e70484. doi:10.1002/cre2.70484
- Momin S, et al. Comparison of image quality, color accuracy, and resolution in intraoral photography using digital single lens reflex camera and smartphone cameras: A pilot study. J Dent Sci. 2026;21(1):358-366. doi:10.1016/j.jds.2025.09.015
- Kim E, et al. Development of polarization dental imaging modality and evaluation of its clinical feasibility. J Dent. 2012;40 Suppl 1:e18-e25. doi:10.1016/j.jdent.2012.04.013
- Society of Esthetic Dentistry, Chinese Stomatological Association. Experts consensus of dental esthetic photography. Zhonghua Kou Qiang Yi Xue Za Zhi. 2017;52(5):265-269. doi:10.3760/cma.j.issn.1002-0098.2017.05.001
- Gurrea J, et al. Evaluation of Dental Shade Guide Variability Using Cross-Polarized Photography. Int J Periodontics Restorative Dent. 2016;36(5):e76-e81. doi:10.11607/prd.2700
- Hein S, Tapia J, Bazos P. eLABor_aid: a new approach to digital shade management. Int J Esthet Dent. 2017;12(2):186-202. PubMed 28653050
- Rivera M, Blatz MB. Meeting an Esthetic Challenge: Shade Matching Veneers and a Crown on Maxillary Incisors. Compend Contin Educ Dent. 2026;47(2):86-90. PubMed 41771163